- Go to:
http://lds.org/lcr
Or on lds.org . . .
Click on My Account and Ward . . .
Then from the drop-down, select Leader and Clerk Resources. - Log in with your lds.org account.

- If you have more than one calling, you may see a drop-down list to the left of the stake's name.

Select your Home or Visiting Teaching calling.
- From the Organizations menu, select Home & Visiting Teaching.

- Statistics for the last year will display.

On the Quorum / Auxiliary drop-down, select your organization. - To view assignments . . .

Click on either the Households or Companionships tabs on the left side. - In the Companionship view . . .

To record visits, check the appropriate boxes. There is no Save button on the page; all changes are recorded immediately.
To edit an assignment, click the Edit button.
Monday, April 27, 2015
Recording Home & Visiting Teaching Statistics on LCR

Sunday, November 30, 2014
Editing Stake, Ward, or Leaders Only Visibility on lds.org
lds.org provides church members with an online ward and stake directory. Just log in and from the Tools menu, select Directory. Be default, all members in the stake can view your family in the directory. You can change your visibility to Stake (the entire stake), Ward (all ward members), or Private - Leadership Only (ward and stake leaders). You can change the visibility level on separate items. For example, your household phone number can be visible at the stake or ward level, while your personal cell phone is for leaders only.
To edit your visibility settings, in the left column of the Directory, click on My Household.

Your family will appear in the right-most column in a view mode. Click on Edit.

In Edit mode, your current visibility level will appear next to items of information, along with an Edit link.

When you click Edit, a balloon will appear.

Select the desired visibility level, then click Save.

In this example, the family photo will only be visible to ward and stake leaders.
Monday, October 27, 2014
FamilySearch Tree app for iOS and Android
Released in July 2014, FamilySearch Tree is an official app of the Church of Jesus Christ of Latter-Day Saints. The new app is a mobile companion to familysearch.org and allows you to browse your family branches, view details on ancestors, and add photos, stories, and audio recordings. The ability to add or edit ancestor details is not currently available, but will be come with future updates.
The first time you launch the app, you will be prompted to sign in.

Log in with your lds.org username and password. You will see a view of your family tree.

To zoom in, place two fingers on the screen, then move them apart.

To expand a different section of the tree, click on the up arrow above and ancestor. To view details, tap on an ancestor's name.

If you have a narrow screen, to see all available options for a person, tap on the menu bar below a person's name and scroll to the right or the left.

For Sources, Photos, Stories, and Audio, you can add information.

Tap on the plus sign at the bottom right of the screen.

If your device has a camera or microphone, you can take photo or an audio recording.
Sunday, August 3, 2014
Introduction to LDS Tools
Members with a mobile
device running Android, Apple iOS, BlackBerry, or Windows Phone
should download LDS Tools, an official app of The Church of Jesus
Christ of Latter-day Saints.
Directory
LDS Tools downloads the
entire ward and stake directory and stores them for offline access.
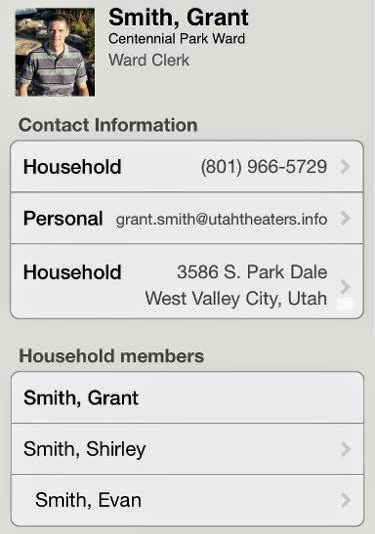
Tap on a member's address to view the location on a map. If your mobile device is a phone, tap on a phone number in the directory to place a call. For incoming calls, LDS Tools can provide secondary caller ID information.
Tap on a member's address to view the location on a map. If your mobile device is a phone, tap on a phone number in the directory to place a call. For incoming calls, LDS Tools can provide secondary caller ID information.

Parents can view
membership record numbers for members of their family, perfect for
helping them create their own lds.org accounts.

To add an individual to
your device's contacts, in Android tap on the three connected dots in
the upper right corner. On iOS, tap on Add to Contacts. You
will be given an option to create a new contact or update an existing
one.
Callings
LDS Tools allows you to
view the entire list of callings for your own ward, the stake, and
other wards in the stake. Tap on a person's name to view contact
info.
Calendar
View details
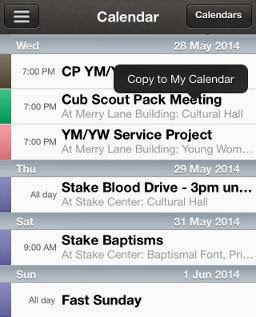
of calendar events for the ward, stake, or entire church. To add
events to your device's calendar, in iOS tap and hold on the event,
then select Copy to My Calendar. In Android, view the details
of the event, then tap on the three connected dots in the upper right
corner.
Synchronization
The data in
LDS Tools only updates when you manually sync.

In iOS, tap on the three horizontal bars in the top right. A menu will open on the left. Tap on Sync. In Android, tap on the device's menu button, then select Sync.
Finding Nearest Meetinghouse in LDS Tools
A recently-added feature to the LDS Tools app allows members to find the nearest meetinghouse. For this feature to work, you must have an active Internet connection.
- In the LDS Tools app . . .

Tap on the menu icon in the upper left. - The menu will appear.

Tap on Meetinghouses. - A progress wheel will spin while the app determines your location.

- A map will display your current location and any nearby meetinghouses. You may need to zoom out to find a meetinghouse (place two fingers on the screen and move them together.)

Tap on a the meetinghouse icon. - The map will re-center on the meetinghouse and display its address in a balloon.

Tap on the information balloon. - A list will show the wards or branches meeting at that location, along with their Sacrament Meeting times.

Tap on ward or branch. - Additional details about the ward will appear.

The Schedule section will show the start times for both Sacrament Meeting and the first meeting of the block (for those wards that hold Sacrament Meeting last.) - To find meetinghouses at a different location, tap search icon along the top of the screen.
Sunday, July 20, 2014
Web Filtering
Protect your family, and yourself, by installing software to filter your access to the web. The products spotlighted below are just a few of the many options available. But they’re free!
K9 Web Protection (Windows, Macintosh)
K9 Web Protection from Blue Coat Systems allows you to chose from more than 70 categories of websites that can be blocked. K9 can enforce the “safe search” option on all major search engines. You can also set time restrictions and custom block lists.
k9webprotection.com
k9webprotection.com
K9 Web Protection Browser (Android, iOS)
The K9 Web Protection Browser provides filtered web access, but only when you use the K9 browser. On Android you can disable other browsers and make K9 your default. iOS, however, your only option is to disable Safari, which can limit functionality in apps that use in-app browsing. Look for the K9 Web Protection Browser in the App Store or Play Store.
OpenDNS
OpenDNS provides web filtering on the network level, automatically working on any connected device, including difficult-to-manage iPod touch or iPad devices. Features include categories and custom block or allow lists. Because it involves making changes on your router or wireless access point, OpenDNS requires a higher skill level for the installation.
K9 Safe Search
A filtered search engine website, including image and news search options.
A filtered search engine website, including image and news search options.
Some general advice for keeping your web browsing environment safe:
- No filtering software is perfect. Self-restraint and oversight are still required.
- Place computers with Internet access in a high-traffic area of the home.
- Keep an eye on children while they browse the web.
- Protect yourself, not just your children.
- Regularly check filtering logs and browser histories files for possible problems.
- Regularly test your filtering software by checking a blocked site that is also harmless. If your software has a custom block list, add a safe site that you have no need access.
Resources:
Tuesday, January 21, 2014
A Tour of Google Drive (Desktop Web Site)
Google Drive allows you to store and edit documents online and share files with others. This article gives a basic overview of the desktop web version of Google Drive.
- Go to drive.google.com and log in with your Google account.

When you first visit Google Drive, you will likely see a blank list. - To create a new folder, click on Create.

From the menu, select Folder.
Enter a name for the folder, then click Create.
The new folder will appear under My Drive in the left pane. - To upload an existing file, go to the folder where you wish to save the file.

Click on the upload icon and select Files.
Browse to and select the file you wish to upload, then click Open.
After uploading, your file will appear in the list. For this example, we uploaded a .ODT file. In order to edit this type of file, you must first open it with Google Docs.
Right-click on the file and from the Open With submenu, select Google Docs.
The document will open in a new window.
A second copy of the file will appear back on the file list. The version without the .ODT file extension is the Google Docs version. - If someone has shared a file or folder with you, and you don't see it already in Google Drive . . .

Click on Shared With Me in the left pane.
A list of shared files or folders, if any, will appear on the right. In this example, Grant Smith shared a folder named Test Folder.
To make the shared material easier to find, both on the web site and on the mobile Google Drive app, check the box on the left of the item, then click Add to My Drive along the top.
The item will now appear under My Drive in the left pane. - You can organize your documents and folders by moving them.

Select the check box to the left of the item you wish to move, then click on the folder icon along the top.
Select a folder, then click Move. In this example, we will move the shared folder Test Folder to the folder New Folder.
The reorganized folder structure is visible in the left pane, under My Drive.
Subscribe to:
Posts (Atom)