Sunday, August 3, 2014

Introduction to LDS Tools

Members with a mobile device running Android, Apple iOS, BlackBerry, or Windows Phone should download LDS Tools, an official app of The Church of Jesus Christ of Latter-day Saints.
 

Directory

LDS Tools downloads the entire ward and stake directory and stores them for offline access.
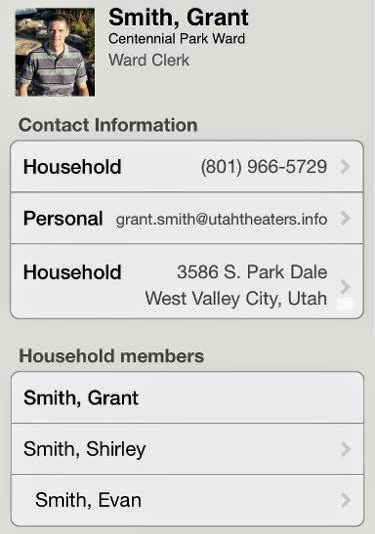


Tap on a member's address to view the location on a map.  If your mobile device is a phone, tap on a phone number in the directory to place a call.  For incoming calls, LDS Tools can provide secondary caller ID information.


Parents can view membership record numbers for members of their family, perfect for helping them create their own lds.org accounts.


To add an individual to your device's contacts, in Android tap on the three connected dots in the upper right corner. On iOS, tap on Add to Contacts. You will be given an option to create a new contact or update an existing one.

Callings

LDS Tools allows you to view the entire list of callings for your own ward, the stake, and other wards in the stake.  Tap on a person's name to view contact info.

Calendar

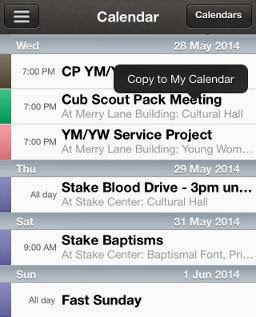
View details of calendar events for the ward, stake, or entire church. To add events to your device's calendar, in iOS tap and hold on the event, then select Copy to My Calendar. In Android, view the details of the event, then tap on the three connected dots in the upper right corner.


Synchronization

The data in LDS Tools only updates when you manually sync. 


In iOS, tap on the three horizontal bars in the top right. A menu will open on the left. Tap on Sync. In Android, tap on the device's menu button, then select Sync.

Finding Nearest Meetinghouse in LDS Tools

A recently-added feature to the LDS Tools app allows members to find the nearest meetinghouse.  For this feature to work, you must have an active Internet connection.
  1. In the LDS Tools app . . .


    Tap on the menu icon in the upper left.
  2. The menu will appear.


    Tap on Meetinghouses.
  3. A progress wheel will spin while the app determines your location.

  4. A map will display your current location and any nearby meetinghouses.  You may need to zoom out to find a meetinghouse (place two fingers on the screen and move them together.)


    Tap on a the meetinghouse icon.
  5. The map will re-center on the meetinghouse and display its address in a balloon.


    Tap on the information balloon.
  6. A list will show the wards or branches meeting at that location, along with their Sacrament Meeting times.


    Tap on ward or branch.
  7. Additional details about the ward will appear.


    The Schedule section will show the start times for both Sacrament Meeting and the first meeting of the block (for those wards that hold Sacrament Meeting last.)
  8. To find meetinghouses at a different location, tap search icon along the top of the screen.

Sunday, July 20, 2014

Web Filtering

Protect your family, and yourself, by installing software to filter your access to the web.  The products spotlighted below are just a few of the many options available.  But they’re free!

K9 Web Protection (Windows, Macintosh)
K9 Web Protection from Blue Coat Systems allows you to chose from more than 70 categories of websites that can be blocked.  K9 can enforce the “safe search” option on all major search engines. You can also set time restrictions and custom block lists.
k9webprotection.com

K9 Web Protection Browser (Android, iOS)
The K9 Web Protection Browser provides filtered web access, but only when you use the K9 browser.  On Android you can disable other browsers and make K9 your default.  iOS, however, your only option is to disable Safari, which can limit functionality in apps that use in-app browsing.  Look for the K9 Web Protection Browser in the App Store or Play Store.

OpenDNS
OpenDNS provides web filtering on the network level, automatically working on any connected device, including difficult-to-manage iPod touch or iPad devices.  Features include categories and custom block or allow lists.  Because it involves making changes on your router or wireless access point, OpenDNS requires a higher skill level for the installation.

K9 Safe Search
A filtered search engine website, including image and news search options.

Some general advice for keeping your web browsing environment safe:
  • No filtering software is perfect.  Self-restraint and oversight are still required.
  • Place computers with Internet access in a high-traffic area of the home.
  • Keep an eye on children while they browse the web.
  • Protect yourself, not just your children.
  • Regularly check filtering logs and browser histories files for possible problems.
  • Regularly test your filtering software by checking a blocked site that is also harmless.  If your software has a custom block list, add a safe site that you have no need access.

Resources:

Tuesday, January 21, 2014

A Tour of Google Drive (Desktop Web Site)

Google Drive allows you to store and edit documents online and share files with others.  This article gives a basic overview of the desktop web version of Google Drive.
  1. Go to drive.google.com and log in with your Google account.


    When you first visit Google Drive, you will likely see a blank list.
  2. To create a new folder, click on Create.


    From the menu, select Folder.


    Enter a name for the folder, then click Create.


    The new folder will appear under My Drive in the left pane.
  3. To upload an existing file, go to the folder where you wish to save the file.


    Click on the upload icon and select Files.


    Browse to and select the file you wish to upload, then click Open.


    After uploading, your file will appear in the list.  For this example, we uploaded a .ODT file.  In order to edit this type of file, you must first open it with Google Docs.


    Right-click on the file and from the Open With submenu, select Google Docs.


    The document will open in a new window.


    A second copy of the file will appear back on the file list.  The version without the .ODT file extension is the Google Docs version.
  4. If someone has shared a file or folder with you, and you don't see it already in Google Drive . . .


    Click on Shared With Me in the left pane.


    A list of shared files or folders, if any, will appear on the right.  In this example, Grant Smith shared a folder named Test Folder.


    To make the shared material easier to find, both on the web site and on the mobile Google Drive app, check the box on the left of the item, then click Add to My Drive along the top.


    The item will now appear under My Drive in the left pane.
  5. You can organize your documents and folders by moving them.


    Select the check box to the left of the item you wish to move, then click on the folder icon along the top.


    Select a folder, then click Move.  In this example, we will move the shared folder Test Folder to the folder New Folder.


    The reorganized folder structure is visible in the left pane, under My Drive.

Sunday, January 19, 2014

Entering Events on lds.org Calendar

The calendar on lds.org provides wards a tool for sharing calendar information with members while also scheduling resources, such as rooms within a meetinghouse.  Members can view the calendar on lds.org or with the LDS Tools app (for iOS or Android).  With some extra configuration, the calendar can also be viewed in Google Calendar, Outlook, the Calendar app in iOS, or any other application that supports the iCalendar format.

Before the lds.org calendar can be of use to members, leaders need to ensure that their scheduled events are available on the calendar.  You might give your cub scouts a flyer on pack meeting, but those papers don't always make it into the hands of parents back home.  Entering the event in the online calendar gives parents and other leaders a place to refer to if any questions arise about what, when, where, who, and how to dress.


How to enter an event on the lds.org calendar:

  1. Log into your lds.org account.


    From the drop-down menu, select Calendar.
  2. The calendar will load.


    To create a new event, click on the plus sign in the top right.
  3. The new event form will appear.


    1. In the Calendar drop-down, select the appropriate calendar for the event.
    2. In the Event box, enter a title for the event.
    3. In the Description box, enter details of the event.  Don't just say, "Pack Meeting."  Parents looking at the calendar may want to know what's happening at a youth activity so they convince their children to attend.  How should people dress?  Warm winter coats for winter caroling or Sunday dress for a devotional?  Where is the activity?  If it's at someone's home, include the address.  Who should attend?  At the Blue & Gold Banquet, are siblings invited or just scouts and their parents?  Be sure to mention any incentives, like refreshments.
  4. In the Location drop-down, select the building where the event will take place.


    You can schedule the entire building, or select individual rooms.  Use the Setup and Cleanup drop-downs to reserve time before and after the official event start and end times.

    If the event does not take place in one of the buildings or rooms listed, select Other Location.


    In the Fill in the Location Below box, enter the location information.
  5. When you try to save the event, you may see a warning about scheduling conflicts.


    To see details, click Show Conflicts.


    An expanded section will show the title of the conflicting appointment, resources scheduled, and contact information for the event editor and building scheduler.

    Sometimes the conflict may be for the very event you are trying to add to the calendar.


    A building scheduler may have reserved rooms for you by entering an event on a calendar you don't have permission to edit.  If this happens, return to the Location drop-down and select Other Location.  (Only do this for conflicts that aren't really conflicts.  If you have any concerns about whether you can use the building, contact the building scheduler.)
  6. The lds.org calendar can create repeating events.


    Check the This Event Repeats box and the Repeats section will appear in the third column.  Individual events in a repeating series should be customized with specific information.  On the calendar, click on the event on the day you want to modify.


    From the pop-up, click Edit Event Details & Location.  An event edit form will appear.


    Add details in the Description box, then click Update Event.  Options for editing repeating events will appear.


    You can select to modify only this event, the entire series, or all following events.  Similar steps can be taken to delete an individual event, without affecting the rest of the series.
  7. The lds.org calendar can send notifications to members who have provided their e-mail address.  Note that members can control what calendars they subscribe to and whether or not they receive the e-mail notifications.


    Check the Send An Email About This Event box.  If you select Later, you can specify the number of minutes, hours, or days before the event that the reminder should be sent.  Recipients will receive an e-mail similar to the following:

Google Voice App on iOS

The Google Voice app on iOS allows you to send and receive text messages from a non-phone device, such as an iPod touch or iPad.

You can also start a phone call using your Google Voice number.  The app does not have the ability to make voice calls on its own.  Instead, it calls one of your "forwarding" phones.  When you answer, it connects you to the person you are trying to reach.  The advantages to placing a call this way are that long distance calls (in the United States) will be free and the person answering your call will see your Google Voice number on their caller ID.

  1. If you haven't already, create a Google Account and activate Google Voice.
  2. Install the Google Voice app on your iOS device.
  3. The first time you run the app, you will see a general welcome screen.


    Tap Sign In.
  4. You will be prompted to sign into your Google Account.


    Enter the e-mail address and password for your Google account, then tap Sign In.
  5. Your Google Voice inbox will appear.


    To send a text message, click Text in the upper right.
  6. You can now compose a text message.


    1. In the To box, enter a phone number.  Or tap the plus sign and select a recipient from your Google contacts.
    2. In the lower box, enter your message.
    3. Tap Send.
  7. You will return to your inbox.


    To place a phone call, tap on Dialer along the bottom.
  8. A dial pad will appear.


    Enter a phone number and tap Call.
  9. A list of your "forwarding" phones will appear.


    Tap on a phone number that you have access to at the moment.
  10. The app will say that it's calling you.


    When your phone rings, answer the call.  On the phone's receiver, you should hear the system ringing you person you were trying to reach.  From here out, it will be like a normal phone call.